How Designers Can Deploy An App incl. API & Database in 60 minutes
A Step by step guide from a fellow designer
We Will Build a “Weather by City” App in 60 Minutes
This is a simple guide for designers using Bolt.New, Supabase, NotebookLLM and ChatGPT.
Step 1: Set up your Supabase backend
Create a Supabase project to store and optionally log user’s city searches. We are using a PosgreSQL database. This database type structures it’s data in tables, similar to how you would save data in an excel sheet.
Task list:
- Create a free account on Supabase.com
- Create a new Supabase project
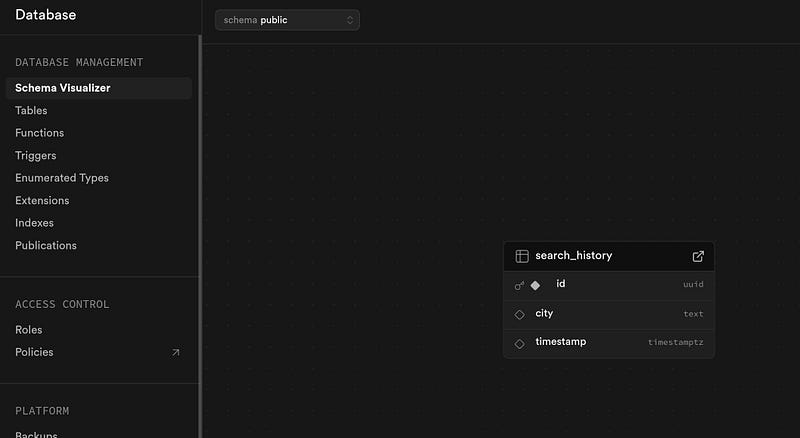
- Ask ChatGPT to give you the SQL-query to add a table called
search_historywithid,city, andtimestamp
Tools:
Supabase & ChatGPT
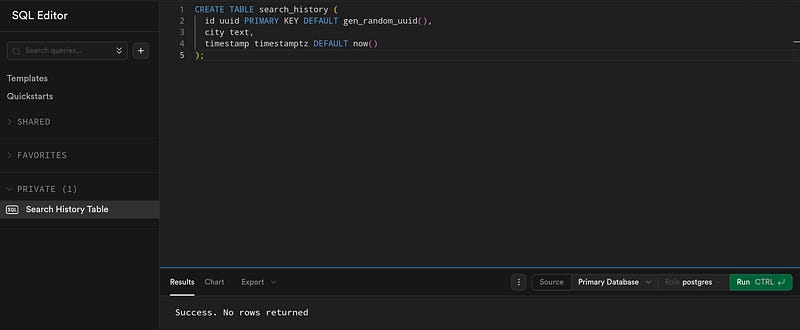
Example SQL query:
CREATE TABLE search_history (
  id uuid PRIMARY KEY DEFAULT gen_random_uuid(),
  city text,
  timestamp timestamptz DEFAULT now()
);
Pro-tip:
When you set up other database tables for your custom project, make sure to reason with ChatGPT about your conceptual, high-level idea before eliciting the SQL prompt. This ensures that you get exactly what you need and don’t have to make changes later on - which at this stage of AI advancement can still be a time consuming task for people that don’t have basic IT knowledge or don’t know their way around version control tools like git.
Step 2: Choose your weather API
API stands for Application Programming Interface. It’s a connection between two systems that enables one piece of software to offer a service to another. In this case, you are tapping into a service that sends your Web App weather information upon your (user’s) request.
We will use the service OpenWeatherMap API to fetch weather by city name. With the free plan we get 1,000 free API calls (requests) per day: More than enough to share the app with friends and colleagues!
An API call itself is structured like when you enter a web adress but with various parameters at the tail-end of the “string” (see example below). Here’s the documentation for the call we are going to make.
Task list:
- Sign up at openweathermap.org
- Get your API key
Tools:
OpenWeatherMap
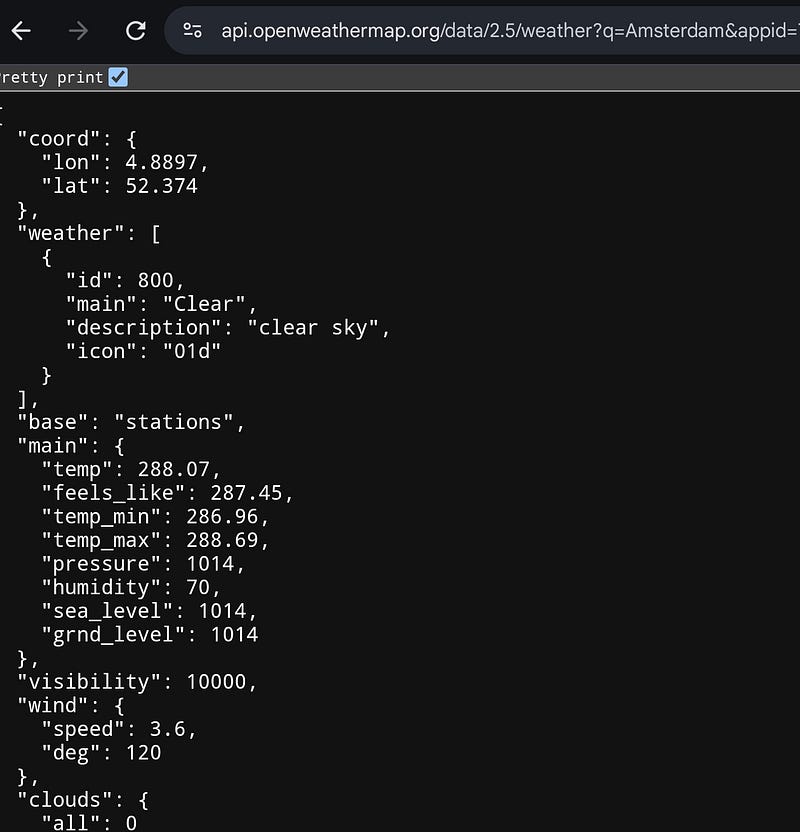
Example:
https://api.openweathermap.org/data/2.5/weather?q=Amsterdam&appid=YOUR_API_KEY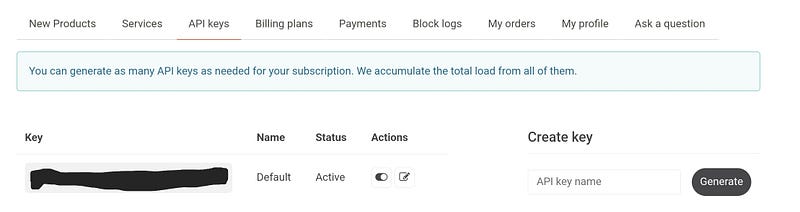
Pro-tip:
Test the API in your browser before integrating it in your code.
Step 3: Start a bolt.new project
Create a simple front-end app to connect to Supabase and the weather API.
Task list:
- Go to bolt.new
- Decide on a template (e.g. React + Tailwind)
- Start/Prompt a new project
Tools:
bolt.new
Example:
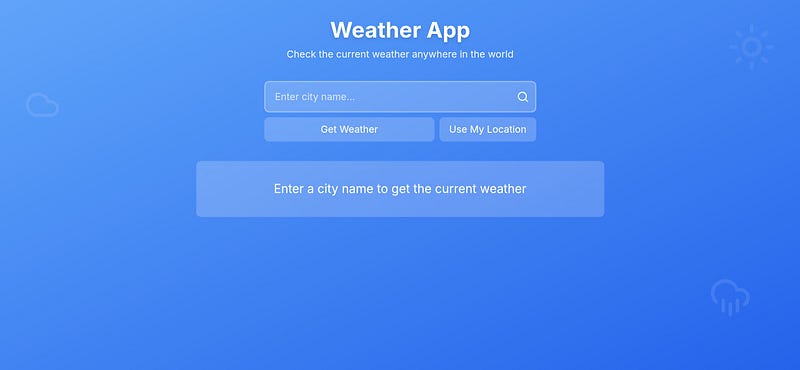
"Create a web app with react & tailwind that has a city input field and a submit button at the top, and displays the current weather in a WeatherCard component below."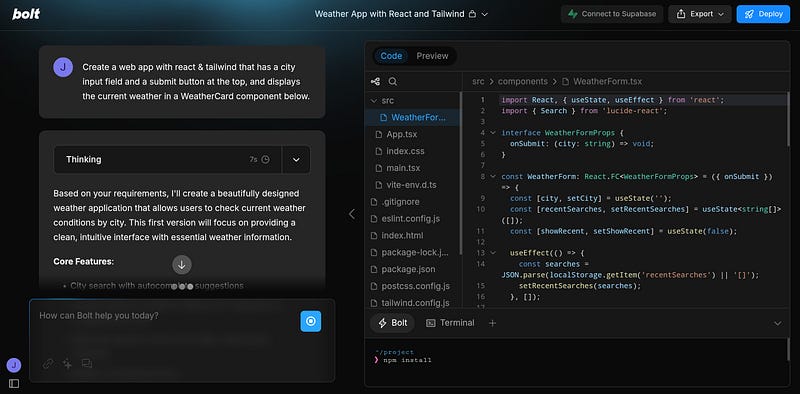
Pro-tip:
Describe the prompt as detailed as possible to avioid generic results or the AI “doing too much”— you can also specify colors and UI style.
---
Step 4: Connect to the weather API
Add logic to fetch weather data from our API.
Task list:
- Paste the Weblink to the API documentation as a ressource into Google’s AI Tool “NotebookLLM”. With this information provided, ask the AI how to make an API call with a city-search-string according to the API’s documentation
- Prompt bolt.new to make the API call with the city string or with the users latitude and longitude. Important: Store the API key as secret to avoid visibility and potential abuse of your credentials once you the app is published.
Tools:
bolt.new & Notebook LLM
Example:
Now get the weather with a call to the weather api:
For "city name" use:
https://api.openweathermap.org/data/2.5/weather?q={city name}&units=metric&appid={API key}
For "lat" and "long" from location use:
https://api.openweathermap.org/data/2.5/weather?lat={lat}&lon={lon}&units=metric&appid={API key}
Here's my API key (make it secret): YOUR_API_KEY
This is the response JSON you will receive. However, the temperaturse will be in Celsius, Make sure to match the data with that on your card, but don't add additional data on the card:

{
 "coord": {
 "lon": 7.367,
 "lat": 45.133
 },
 "weather": [
 {
 "id": 501,
 "main": "Rain",
 "description": "moderate rain",
 "icon": "10d"
 }
 ],
 "base": "stations",
 "main": {
 "temp": 284.2,
 "feels_like": 282.93,
 "temp_min": 283.06,
 "temp_max": 286.82,
 "pressure": 1021,
 "humidity": 60,
 "sea_level": 1021,
 "grnd_level": 910
 },
 "visibility": 10000,
 "wind": {
 "speed": 4.09,
 "deg": 121,
 "gust": 3.47
 },
 "rain": {
 "1h": 2.73
 },
 "clouds": {
 "all": 83
 },
 "dt": 1726660758,
 "sys": {
 "type": 1,
 "id": 6736,
 "country": "IT",
 "sunrise": 1726636384,
 "sunset": 1726680975
 },
 "timezone": 7200,
 "id": 3165523,
 "name": "Province of Turin",
 "cod": 200
}
Pro-tip:
Convert the temperature from Kelvin to Celsius or Fahrenheit for better UX. I did so in advance by adding the “units”-parameter in the API call. A less efficient alternative would be to ask bolt to convert the API response values.
Step 5: Connect To Supabase
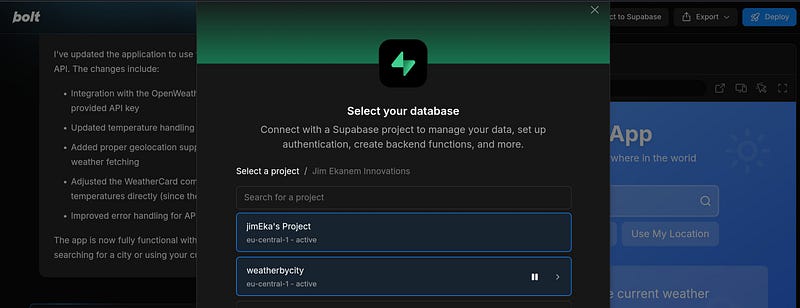
Task list:
- Click on “Connect To Supabase”
- Select Your Project
- Tell bolt how it should use the table you created
Tools:
bolt.new & supabase
Example:
"There's a table in the connected supabase database called "search_history". Use that to save recent searches"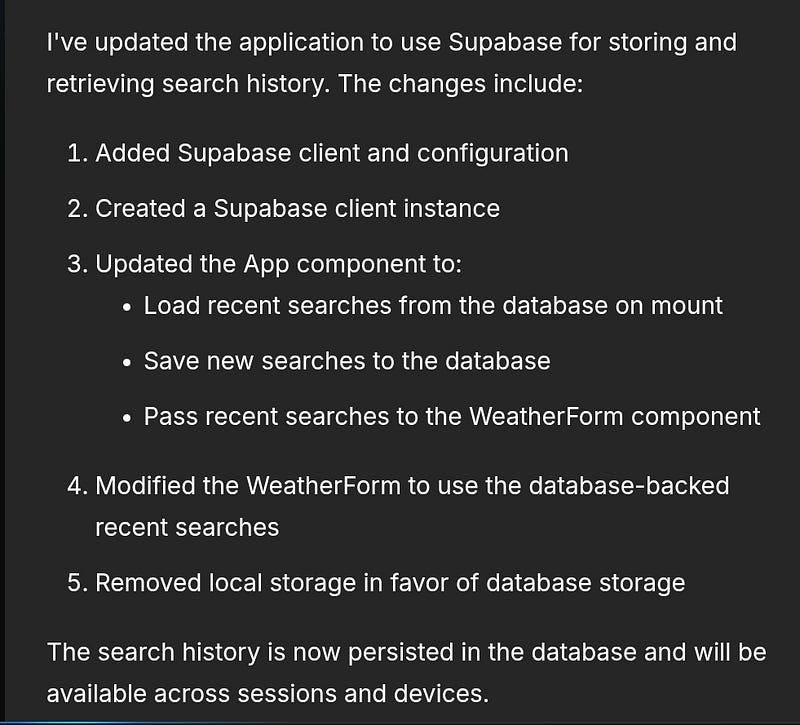
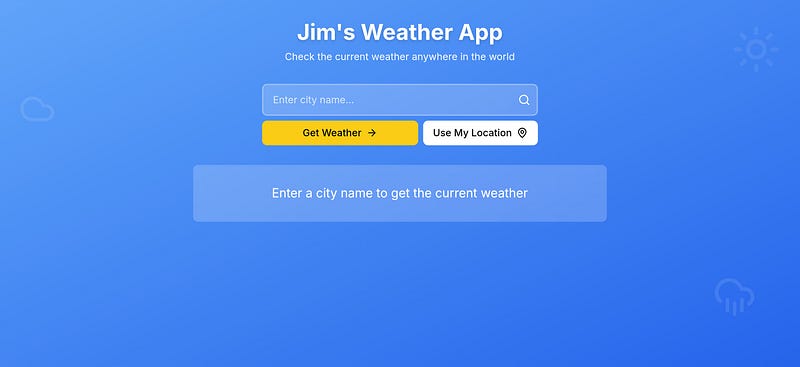
Step 6: Tweak the design
Now it’s time to leverage you superpower as a designer. Make your app look clean, usable, and mobile-friendly — this will set your apps and prototypes apart from the builds that anyone can soon make in the new era of AI.
Task list:
- Increase The UX by prompting with your knowledge on usability and design principles.
Tools:
bolt.new
Example:
Make the "Get Weather" Button yellow and add an "enter" icon next to the text.
Make the "Use my location" button white with black font color and add a "location" icon next to the text.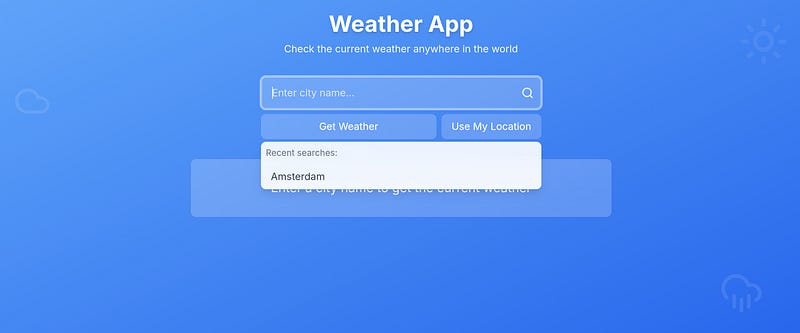
Pro-tip:
Use real weather icons from the API for visual appeal.
Step 7: Deploy your app
Launch your app and share the link with the world.
Task list:
- Click “Deploy” at the top right of the bolt.new interface
- Click the link it gives you in the chat to claim your netlify project with a new account that you must create
- Copy your live link and share it with the world ;)
Tools:
Bolt.New &Netlify
Example:
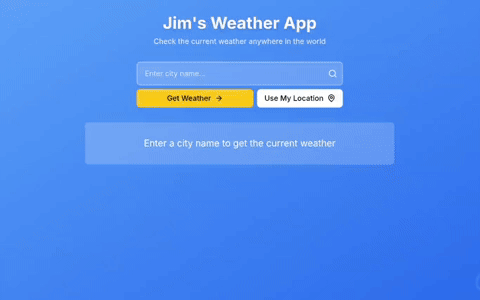
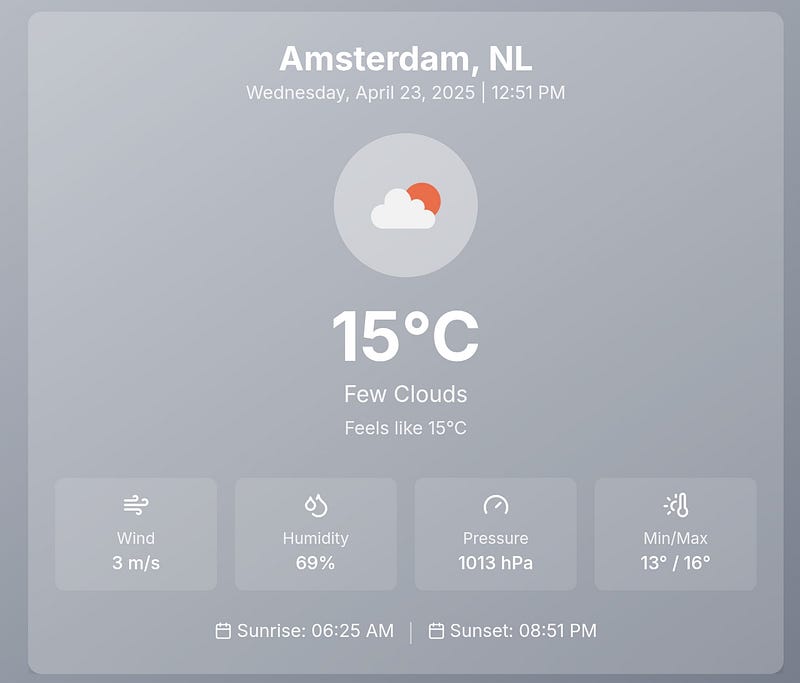
Your app might be live like mine at:
https://jims-weatherapp.netlify.app
Pro-tip:
If you want to turn your app into a side-hustle you can add a custom domain later to personalize your app’s URL.
You’ve reached the end of this tutorial. Congrats on launching your own app! — please share the link with me on LinkedIn or in the comments.